There are many benefits to having a four year old at home. Not only is she my darling wonderful little girl, but she is also a perfect control group for new works. When I come up with an idea for my class, and I am not really sure about how I will present it or how it will actually work, you can be sure my first lesson will go to Imogen. As they tell you in your training, it is essential to practice giving lessons, and when you have such a willing audience, it is easy.

In an effort to enliven our classroom art shelf and, hopefully make something pretty for Mother’s Day, I started researching marbleizing paper. There are beautiful paper marbleizing kits from Japan, but those were both beyond my budget and my ability. After a little quality Google research, I settled on shaving cream paper marbling. As usual, Google turns up many tutorials, and they’re all basically the same, this is the one I followed.
After a speedy trip to CVS to pick up a new can of shaving cream, we were prepared!
 Materials:
- Shaving cream
- Watered down food coloring in bowls
- Small tray
- Syringe, a dropper would have been much better
- Thin paint brush
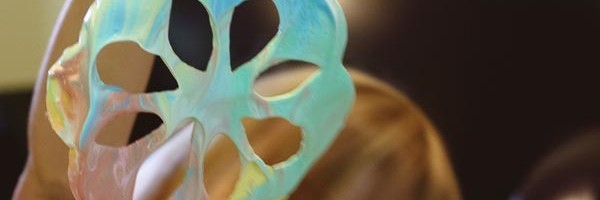
- Heavy paper, ours were cut into flower shapes (or flowerflakes as we started calling them, since they really looked more like snowflakes)
- Scraper of some sort, I used a spatula
- Many towels, rags or washcloths

Process:
- We covered the tray with shaving cream and smoothed it out in a uniform layer
- Imogen used the syringe to transfer food coloring from the bowls to the shaving cream layer
- She then used the stick end of the paintbrush to draw through the colors and swirl and mix them
- Next, she gently pressed the paper flowers into the shaving cream
- Finally, she moved the paper flowers to another table and I scraped the foam off. I think Imogen could have easily scraped the foam off a single piece of paper, but since ours was cut in flower shapes, they easily ripped and snagged as we were trying to remove the foam.
- She was usually able to use the design she made for two flowers. Then we mixed the shaving cream and colors together and added a little more fresh shaving cream on top. Doing this did give later prints more of a light purple/gray background color, but they all were beautiful.
- After they dried Imogen punch holes in them and we threaded string them and hung them up.
- And yes, she arranged them largest to smallest.

Verdict:
Was this a wonderful, fantastic activity that I will do again? Yes. Am I going to put it in my class? Not this year. Why? One, I need more practice with it. I want try the process with solid pieces of paper so I can see if Imogen can scrape the foam off by herself. If I have the work in the class, I want the child to be as independent as possible, and if I have to scrape the shaving cream off every piece of paper, well that’s just not going to work. Second, I can’t figure out how the child would really be able to clean up the work and make it ready for the next person. My original thought was they would just have to wash the tray with the shaving cream. Maybe Imogen and I are just a messy pair, but we had shaving cream everywhere – on ourselves, the table, the floor. Once the shaving cream gets on the scraper and you set it down on the table, I swear it multiplies, expands, and covers every available surface.
The great thing about doing it at home, you get to do this when you’re done:

My Montessori mama teacher used to practice on me at home all the time. I loved it! By the time I was in elementary school, she was teaching me how to GIVE the lessons, which I loved equally. Your snowflowers turned out super pretty! I wonder if the tearing wouldn’t be as much of an issue if you did the marbling on a whole sheet of thick paper and then cut them out when dry?
I took your facebook advice and we did make some for Mother’s Day cards — they really looked lovely.
They turned out so nice. Your little girl must love it when you practice with her. 🙂
I would love it if you would come link up on our Artsy Play Wednesday kids’ craft linky. http://bit.ly/10pd4Bh
She did really enjoy the process, but she REALLY loved the mess!
Beautiful, Aimee! Such a gorgeous, messy, fun activity! Thanks so much for linking up on my wall today!
Thanks for the opportunity to share!